Rice cultivation follows a seasonal cycle that begins 6-12 months before seeds enter the soil. Variety selection, input procurement, field preparation, nursery management, transplanting, irrigation, fertilization, pest management, harvest, and post-harvest handling—each phase depends on decisions made in the preceding stage. Preparation determines success more than any individual management decision during the growing season.
This guide walks through the complete rice production cycle as practiced in Pakistani conditions, with emphasis on timing, decision points, and the reasoning behind each recommendation. The principles apply whether you're managing a smallholder plot or a large-scale operation.
Phase 1: Planning and Preparation (Months Before Planting)
Successful rice cultivation starts here—often 6-12 months before actual planting. This phase encompasses variety selection, input procurement, and field preparation planning.
Step 1: Select the Right Variety
Variety selection is the most consequential decision of the production cycle. It determines yield potential, market value, input requirements, and harvest timing. Choose based on:
Market destination: Basmati varieties for premium export markets, IRRI varieties for commodity or industrial buyers, Super Kernel for traditional buyers.
Growing season length: Early varieties (110-120 days) suit short seasons or double-cropping; medium varieties (125-140 days) offer yield and flexibility balance; late varieties (145-160 days) maximize yield potential in long-season areas.
Field conditions: Flood-prone fields need submergence tolerance; drought-prone areas need drought tolerance; saline fields need salt tolerance. No single variety excels in all conditions.
Disease pressure: If bacterial leaf blight has been severe historically, select varieties with known resistance. Don't repeat past mistakes.
Source seed from certified producers or reputable dealers. Understanding soil preparation methods is equally important before planting quality rice varieties. The premium for certified seed—typically 10-15% above grain prices—returns value through guaranteed purity, germination, and freedom from seed-borne diseases.
Step 2: Procure Inputs
Once variety is selected, calculate input requirements for the planned area. This includes:
- Fertilizers: urea, DAP, SOP or MOP based on soil test recommendations
- Pesticides: herbicides for early season control, fungicides, insecticides for anticipated pest pressure
- Fuel for land preparation and irrigation pumps
- Labor availability for transplanting, weeding, harvest
Procure inputs before the season begins when prices are stable and availability is guaranteed. Last-minute input purchases during peak demand periods face both price premiums and potential stockouts.
Step 3: Plan Land Preparation
Review field history and plan the preparation sequence. If incorporating crop residues or green manures, planning needs to begin early enough to allow decomposition. If drainage improvements or laser leveling are planned, arrange equipment before the season.
Phase 2: Nursery Preparation and Raising Seedlings (25-30 Days Before Transplanting)
For transplanted rice systems, the nursery phase deserves attention it rarely receives. Weak seedlings produce weak crops regardless of subsequent management quality.
Step 4: Prepare the Nursery Seedbed
Select a well-drained location with easy water access but no waterlogging. The ideal nursery seedbed is elevated slightly above surrounding fields, close to the main field for easy seedling transport, and has been fallow or in another crop for several seasons to reduce disease carryover.
Prepare the seedbed 2-3 weeks before intended sowing. Incorporate well-decomposed farmyard manure at 1-2 kg per square meter. Create a firm, finely textured seedbed—this firm surface enables even seed placement and good seed-to-soil contact.
The recommended seedbed area is approximately 100 square meters per hectare of main field. This produces sufficient seedlings at the recommended 20-25 seedlings per hill for transplanting.
Step 5: Seed Treatment and Sowing
Before sowing, treat seed with appropriate fungicide to reduce seed-borne disease. The fungicide choice depends on the specific diseases present historically—consult local agricultural extension for region-specific recommendations.
Sowing rate in the nursery is 40-50 kg seed per hectare of main field. This rate produces seedlings of optimal age and vigor. Higher rates produce overcrowded, weak seedlings; lower rates waste nursery space.
Spread seed evenly across the prepared seedbed and press lightly to ensure good soil contact. Cover lightly with soil or rice husk if available. Maintain consistent moisture from sowing through germination.
Step 6: Nursery Management
The critical period for nursery management is the first 10-14 days. Maintain soil moisture near field capacity without waterlogging. Once seedlings emerge and develop the second leaf stage, reduce watering frequency to harden plants and prepare for transplanting.
Apply nitrogen fertilizer at approximately 50 kg urea per hectare of nursery area around 10 days after emergence. This provides a growth boost that produces robust seedlings without excessive softness.
Begin hardening seedlings 7-10 days before intended transplanting by reducing water applications. This stress prepares seedlings for the mild shock of transplanting and improves establishment in the main field.
Phase 3: Main Field Preparation and Transplanting
Step 7: Field Preparation
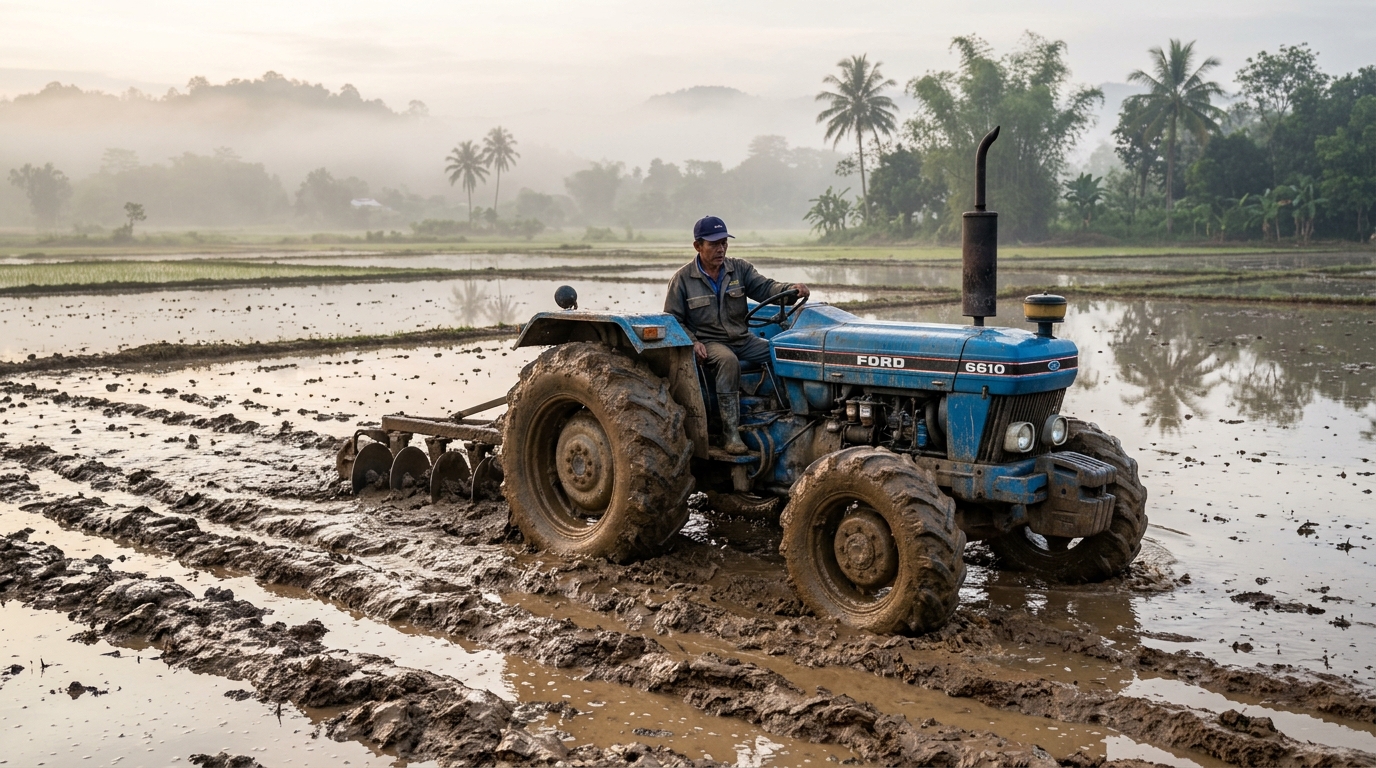
Begin main field preparation 3-4 weeks before transplanting. Initial plowing should be thorough—15-20 cm depth—to incorporate previous crop residues, control weeds, and create a seedbed for transplanting. The soil moisture should be at field capacity during plowing—neither saturated nor dry.
Puddling follows plowing in wet-seeded or transplanted systems. Working saturated soil into a mud slurry creates a compacted layer that reduces water infiltration and simplifies transplanting operations. This traditional practice serves a real purpose in flooded systems though it's counterproductive in direct-seeded rice.
Final leveling should produce a field with less than ±2 cm elevation variation. This precision ensures uniform water coverage and consistent crop growth.
Step 8: Fertilize Basal Applications
Apply basal fertilizer before final leveling so nutrients incorporate into the soil profile. Typical basal applications include:
- Full phosphorus requirement (as DAP or single superphosphate)
- Full potassium requirement for soils testing low-medium in potassium
- 30-40% of total nitrogen requirement (as urea or ammonium sulfate)
- Zinc sulfate if soil tests indicate deficiency or if fields have been in rice for multiple consecutive seasons
Incorporate basal fertilizers before the final puddling pass so they're distributed throughout the puddled layer where transplanting will occur.
Step 9: Transplanting
Transplant seedlings at 21-25 days after sowing for optimal age. Seedlings older than 30 days suffer establishment setbacks that reduce yield. The ideal seedling has 4-5 leaves and well-developed tillers.
Transplant spacing depends on variety and fertility level. The standard recommendation is 20x20 cm for medium-duration varieties in good fertility fields. Wider spacing (25x25 cm or greater) suits vigorous varieties with strong tillering capacity. Denser spacing doesn't linearly increase yield—it can reduce it through competition and disease pressure.
Transplant depth matters critically. Plant seedlings shallow—2-3 cm depth. Deep planting suppresses tillering and delays maturity. Each centimeter of additional planting depth beyond optimal reduces yield by 2-3% through direct stress effects.
Phase 4: Crop Management (Transplanting Through Grain Filling)
Step 10: Early Season Care
The first 21 days after transplanting determine the foundation for subsequent growth. Maintain consistent soil saturation—no standing water during this period. Standing water in the first weeks causes root stress that delays establishment.
Weed control during the establishment period deserves immediate attention. Weeds outcompete seedlings more effectively than they compete with established plants. Pre-emergence herbicide application within 72 hours of transplanting, or manual weeding if labor is available, should not be delayed.
Gap filling—replanting dead or missing hills—should occur within 10 days of transplanting. Delaying gap filling allows adjacent plants to expand into the space, making later filling ineffective.
Step 11: Nutrient Management
Split nitrogen applications to match physiological needs rather than single large applications. The recommended split timing:
- First application: 7-10 days after transplanting when seedlings establish
- Second application: 25-30 days after transplanting at Tillering
- Third application: 45-55 days after transplanting at panicle initiation
- Fourth application (if appropriate): 70-80 days after transplanting at heading for grain filling
The exact number of splits and amounts per application depend on soil fertility, variety, and yield goals. Higher-yielding systems require more splits to maintain nutrient availability without excess that causes lodging.
Monitor leaf nitrogen status using leaf color charts if available. Target leaf color in the moderate range—neither pale yellow indicating deficiency nor excessively dark green indicating luxury consumption.
Step 12: Water Management
After the establishment period, transition to alternate wetting and drying for water-efficient production. Maintain 3-5 cm water depth during the wet phase, then allow water to disappear completely before re-irrigating. Wait 24-48 hours after water disappears to re-flood—this brief aerobic period stimulates root development.
Suspend alternate wetting and drying during panicle initiation and flowering. Maintain continuous shallow flooding during these critical growth stages. Return to alternate wetting and drying after flowering completes.
Monitor for drainage problems throughout the season. Water accumulation causing prolonged saturation indicates drainage issues that need addressing regardless of season timing.
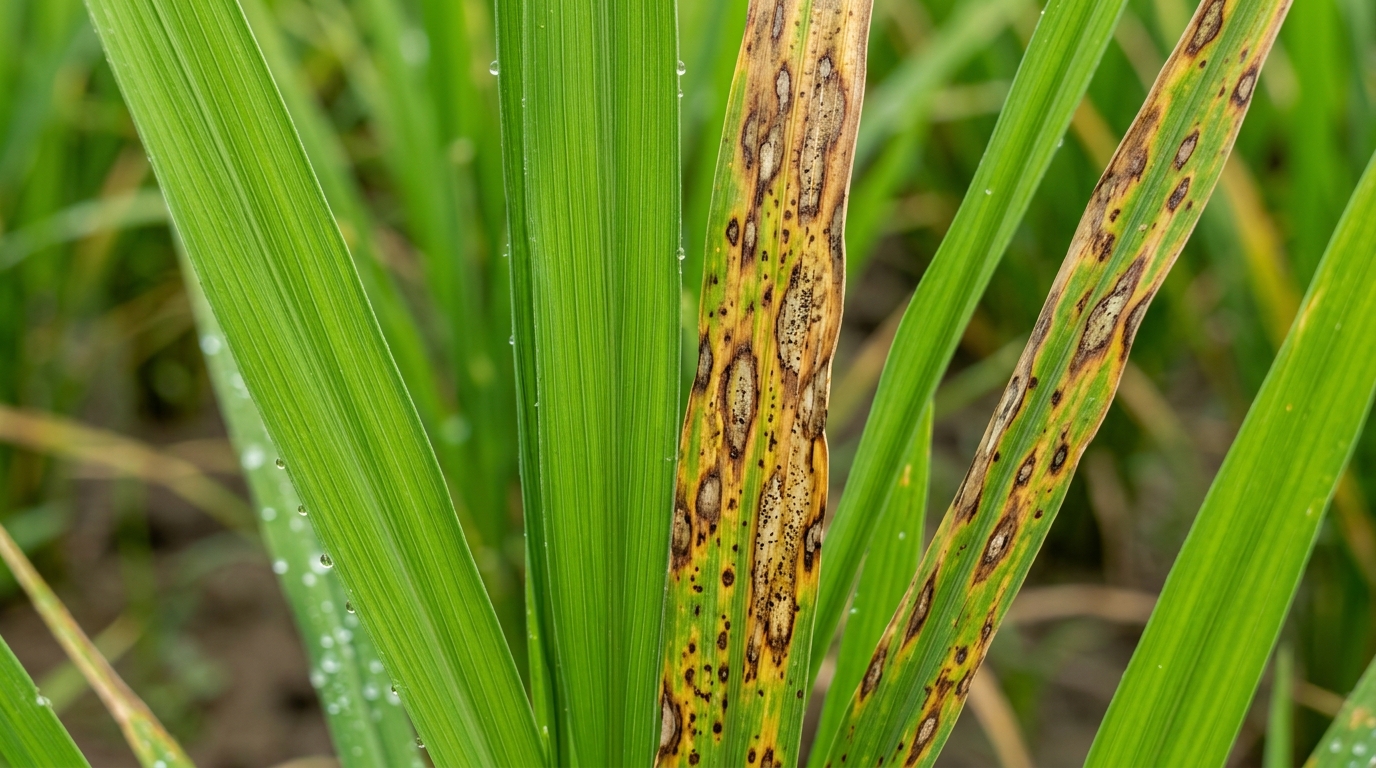
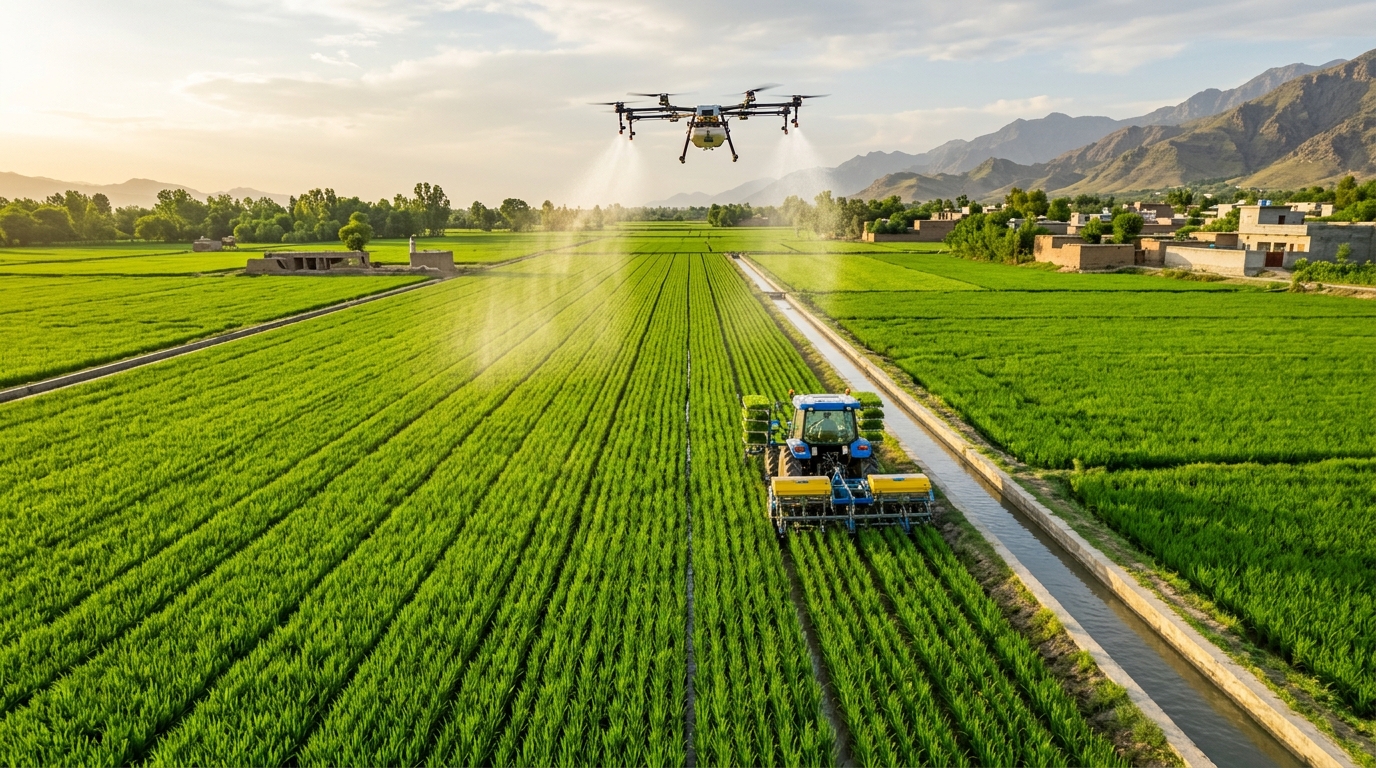
Step 13: Pest and Disease Management
Scout fields weekly during the growing season. Early detection enables management intervention while treatments can still prevent economic loss. Learn to identify the major pests and diseases in your region:
- Insect pests: stem borers, leafhoppers, planthoppers, armyworms
- Diseases: bacterial leaf blight, blast, sheath blight, brown spot
- Nutrient deficiencies: nitrogen, potassium, zinc—often visible before symptoms become severe
Treatment decisions should follow established economic thresholds rather than calendar-based schedules. According to agricultural research from USDA, applying pesticides when pest populations are below threshold wastes money and disrupts beneficial insect populations.
Phase 5: Harvest and Post-Harvest
Step 14: Determining Harvest Readiness
Harvest timing significantly affects both yield and quality. The optimal harvest moisture content is 20-24%. At this moisture, grain has achieved full size and weight but remains firm enough to resist mechanical damage during harvest and drying.
Visual indicators of harvest readiness include yellowing of leaves across most of the field, grain moisture at the panicle tip reaching approximately 20%, and grain becoming firm when squeezed. Cutting a sample panicle and squeezing individual kernels helps assess actual moisture content.
Waiting too long increases shattering losses—mature grain falls from the panicle with any physical disturbance. Harvesting too early results in green, lightweight kernels that grade poorly and reduce milling yield.
Step 15: Harvest Operations
Cut plants close to the ground or at the base of the panicle depending on harvest method. Manual harvesting using sickles remains common for small areas. Mechanical harvesting using reaper-binders or combines increases efficiency for larger operations.
If using combine harvesters, adjust settings for rice—the crop requires different cylinder speed and concave settings than wheat. Improper combine settings cause excessive broken kernels, which downgrade quality.
Transport harvested grain from field to threshing or drying area quickly. Prolonged field stacking creates heating that reduces quality and can cause spontaneous combustion risk in dry conditions.
Step 16: Drying and Storage
Dry grain to 12-14% moisture for safe storage. Sun drying works but requires constant turning and attention to prevent over-drying. Mechanical drying provides more uniform results with less labor.
Storage facilities should be clean, dry, and protected from pests and moisture. Grain bags stacked on pallets allow air circulation beneath the stored grain. Regular monitoring for moisture and pest activity enables early detection of problems.
Conclusion
Rice cultivation success emerges from attention to detail throughout the production cycle rather than heroic interventions at any single stage. The guide I've outlined here isn't complicated in concept—it's simply comprehensive, covering all the factors that actually determine yield and quality.
What separates consistently successful rice farmers from average performers isn't access to secret techniques or superior inputs. It's the discipline of executing each step properly rather than cutting corners and hoping subsequent management can compensate. That discipline develops over seasons of attention and observation. The farmers who excel treat each season as an opportunity to learn and refine their approach.
Frequently Asked Questions
What is the best time to start rice cultivation planning?
Rice cultivation planning should begin 6-12 months before planting. This includes variety selection based on market destination and growing season, procurement of fertilizers and pesticides, and planning for land preparation, drainage improvements, or laser leveling if needed.
What is the optimal seedling age for transplanting?
Transplant seedlings at 21-25 days after sowing for optimal age. Seedlings older than 30 days suffer establishment setbacks that reduce yield. The ideal seedling has 4-5 leaves and well-developed tillers.
How should nitrogen fertilizer be applied to rice?
Nitrogen should be applied in split applications to match physiological needs. Recommended timing: first application 7-10 days after transplanting, second at active Tillering (21-28 days), third at panicle initiation (42-50 days), and optionally fourth at heading (60-70 days) for grain filling.
When is rice ready for harvest?
Harvest at 20-24% grain moisture content. Visual indicators include yellowing of leaves across most of the field, grain moisture at the panicle tip reaching approximately 20%, and grain becoming firm when squeezed. Waiting too long increases shattering losses; harvesting too early results in lightweight kernels.
What are the key stages of rice crop growth?
Rice growth stages include: seedling stage (0-21 days), vegetative/Tillering (22-65 days), panicle initiation (66-85 days), flowering (86-105 days), grain filling (106-130 days), and maturation/harvest (131-150+ days). Each stage has specific water and nutrient requirements.